How to configure LDAPS with AVS
In this post, we are going to be configuring LDAPS (LDAP Over SSL) for Azure Vmware Solution (AVS).
Pre-requisites
- Jump Box
- RSAT Tools
- PowerShell installed
The expected outcome
- Variables we used and information you need
- 1. Log into Azure
- 2. Export required certificates
- 3. Create a storage account
- 4. Create a container
- 5. Upload certificates to container
- 6. Create the SAS Tokens
- Execute the AVS Run Command
The plan is to automate as much of this process as possible. We will use PowerShell to complete steps 1-6 as above. For now, step 7 needs to be manual, we are working on automating this as well.
Variables we used and information you need
We use the following.
DNS Name = avsemea.com
Netbios Name = AVSEMEA
You will see that we use the Fully Qualified domain names later with the computer names we reference later. We use FQDN as much as possible and try to hard code as little making these snippets more portable into your environment(s).
We are using a jump-box, which is domain joined, deployed into Azure and protected with Azure Bastion. THe snippets below are run on this jump-box, which has RSAT installed.
1. Log into Azure
Update the variables as needed, in this case, $azSubscriptionID
Notes
$azSubscriptionID would need to be updated with your Subscription ID.
$azSubscriptionID = ""
Login-AzAccount
Set-AzContext -Subscription $azSubscriptionID
2. Export required certificates
You will need to have OpenSSL installed. You can do this manually, or use a package manager like winget or chocolatey
Notes
$openSSLFilePath may need to be changed, was installed using chocolatey in our example.
$remoteComputers would need to be changed to suit your environment.
$exportFolder can be changed to something more suitable for your environment.
## Get certs
$openSSLFilePath = "C:\Program Files\OpenSSL-Win64\bin\openssl.exe"
$remoteComputers = "avs-gwc-dc001.avsemea.com","avs-gwc-dc002.avsemea.com"
$port = "636"
$exportFolder = "c:\temp\"

foreach ($computer in $remoteComputers)
{
    $output =  echo "1" | & $openSSLFilePath "s_client" "-connect" "$computer`:$port" "-showcerts" | out-string
    $Matches = $null
    $cn = $output -match "0 s\:CN = (?<cn>.*?)\r\n"
    $cn = $Matches.cn
    $Matches = $null
    $certs = select-string -inputobject $output -pattern "(?s)(?<cert>-----BEGIN CERTIFICATE-----.*?-----END CERTIFICATE-----)" -allmatches
    $cert = $certs.matches[0]
    $exportPath = $exportFolder+($computer.split(".")[0])+".cer"
    $cert.Value | Out-File $exportPath -Encoding ascii
}
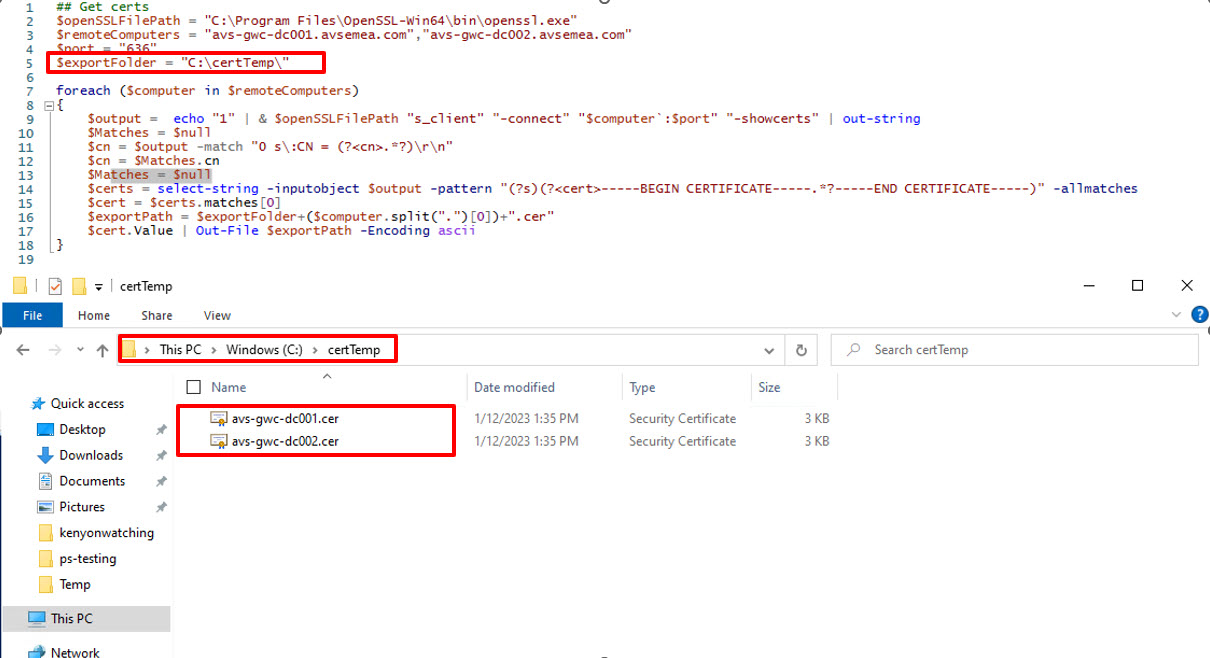
You can see the exported files in the picture below.
3. Create a storage account
Notes
$resourceGroupLocation will need to be updated to your desired location.
$storageRgName will need to be updated.
$storageAccountName will need to be updated.
## create storage account

$resourceGroupLocation = "germanywestcentral"
$storageRgName = "avs-$resourceGroupLocation-operational_rg"
## Storage account variables
$guid = New-Guid
$storageAccountName = "avsgwcsa"
$storageAccountNameSuffix = $guid.ToString().Split("-")[0]
$storageAccountName = (($storageAccountName.replace("-",""))+$storageAccountNameSuffix )
## Define tags to be used if needed
## tags can be modified to suit your needs, another example below.
#$tags = @{"Environment"="Development";"Owner"="FTA";"CostCenter"="123456"}
$tags = @{"deploymentMethod"="PowerShell"; "Technology"="AVS"}
## create storage account
$saCheck = Get-AzStorageAccount -ResourceGroupName $storageRgName -Name $storageAccountName -ErrorAction SilentlyContinue
if ($null -eq $saCheck)
{
    New-AzStorageAccount -ResourceGroupName $storageRgName -Name $storageAccountName -Location $resourceGroupLocation -SkuName Standard_LRS -Kind StorageV2 -EnableHttpsTrafficOnly $true -Tags $tags
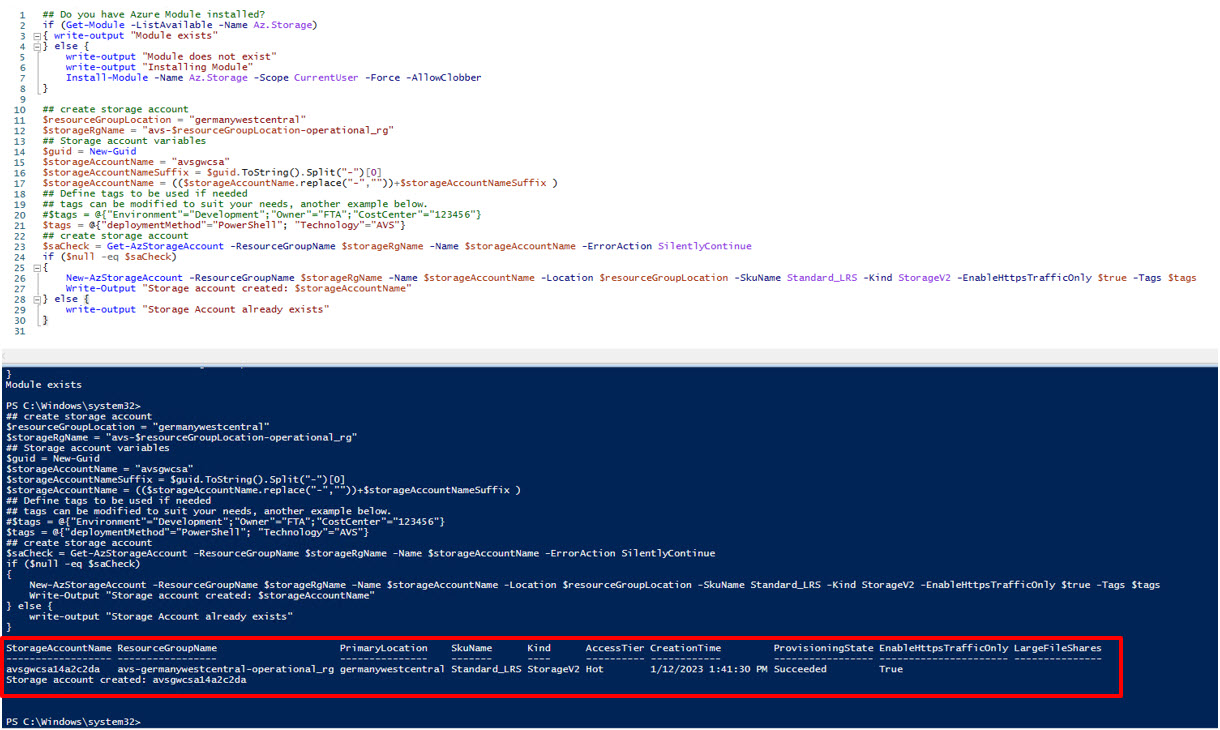
    Write-Output "Storage account created: $storageAccountName"
} else {
    write-output "Storage Account already exists"
}
4. Create a container
Notes
$containerName will need to be updated
## create container
$containerName = "ldaps"
$containerCheck = Get-AzStorageContainer -name $containerName -Context (Get-AzStorageAccount -ResourceGroupName $storageRgName -Name $storageAccountName).Context -ErrorAction SilentlyContinue
if ($null -eq $containerCheck)
{
    New-AzStorageContainer -name $containerName -Context (Get-AzStorageAccount -ResourceGroupName $storageRgName -Name $storageAccountName).Context
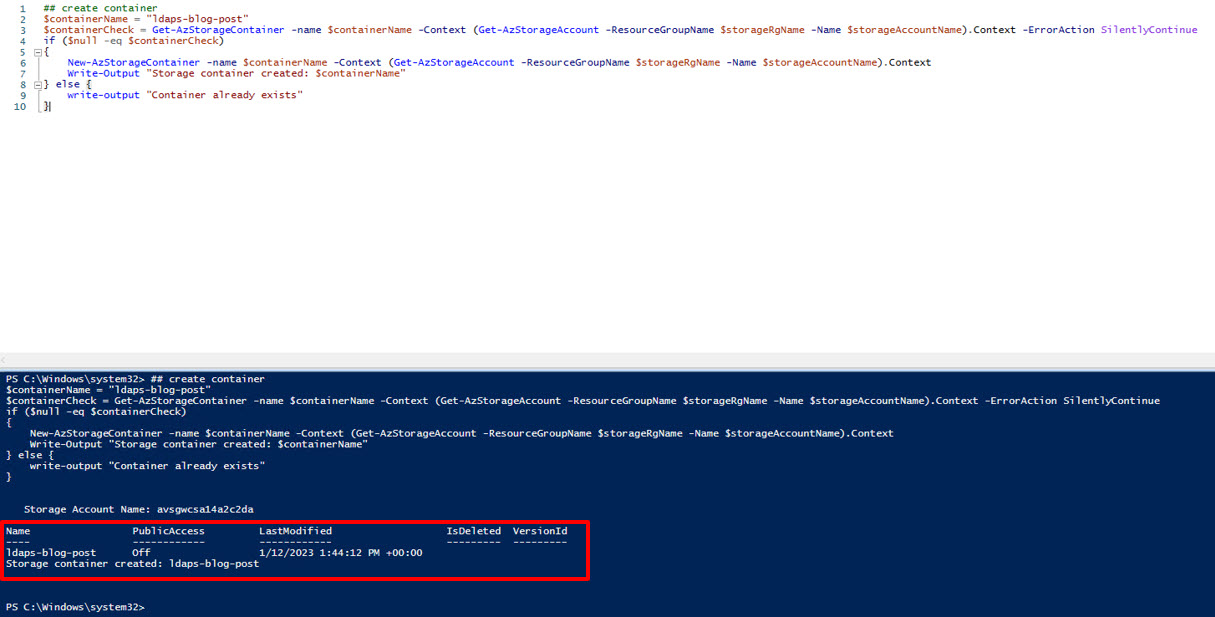
    Write-Output "Storage container created: $containerName"
} else {
    write-output "Container already exists"
}
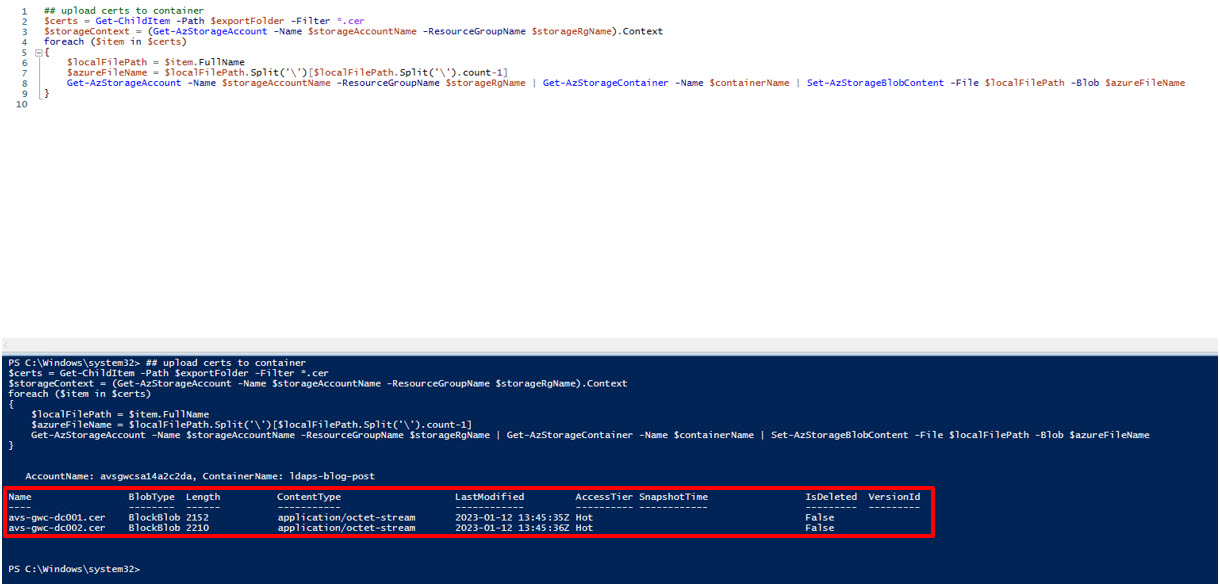
5. Upload certificates to container
## upload certs to container
$certs = Get-ChildItem -Path $exportFolder -Filter *.cer
$storageContext = (Get-AzStorageAccount -Name $storageAccountName -ResourceGroupName $storageRgName).Context
foreach ($item in $certs)
{
    $localFilePath = $item.FullName
    $azureFileName = $localFilePath.Split('\')[$localFilePath.Split('\').count-1]
    Get-AzStorageAccount -Name $storageAccountName -ResourceGroupName $storageRgName | Get-AzStorageContainer -Name $containerName | Set-AzStorageBlobContent -File $localFilePath -Blob $azureFileName
}
6. Create the SAS Tokens
Notes
$containerName will need to be updated
## create SAS token
$containerName = "ldaps"
$blobs = Get-AzStorageBlob -Container $containerName -Context $storageContext | Where-Object {$_.name -match ".cer"}
foreach ($blob in $blobs)
{
    $StartTime = Get-Date
    $EndTime = $startTime.AddHours(24.0)
    $sasToken = New-AzStorageBlobSASToken -Container $containerName -Blob $blob.name -Permission rwd -StartTime $StartTime -ExpiryTime $EndTime -Context $storageContext -FullUri
    #$sasToken
    write-host "SASToken created: $sasToken"
}
SASToken created: https://avsgwcsa14a2c2da.blob.core.windows.net/ldaps-blog-post/avs-gwc-dc001.cer?sv=2021-10-04&st=2023-01-12T13%3A46%3A45Z&se=2023-01-13T13%3A46%3A45Z&sr=b&sp=rwd&[Removed]
SASToken created: https://avsgwcsa14a2c2da.blob.core.windows.net/ldaps-blog-post/avs-gwc-dc002.cer?sv=2021-10-04&st=2023-01-12T13%3A46%3A45Z&se=2023-01-13T13%3A46%3A45Z&sr=b&sp=rwd&[Removed]
Execute the AVS Run Command
These steps, for now, are run manually from the Azure Portal. This will be found “Azure VMware Solution” and under Operations, Run command. Then select “New-LDAPSIdentitySource”
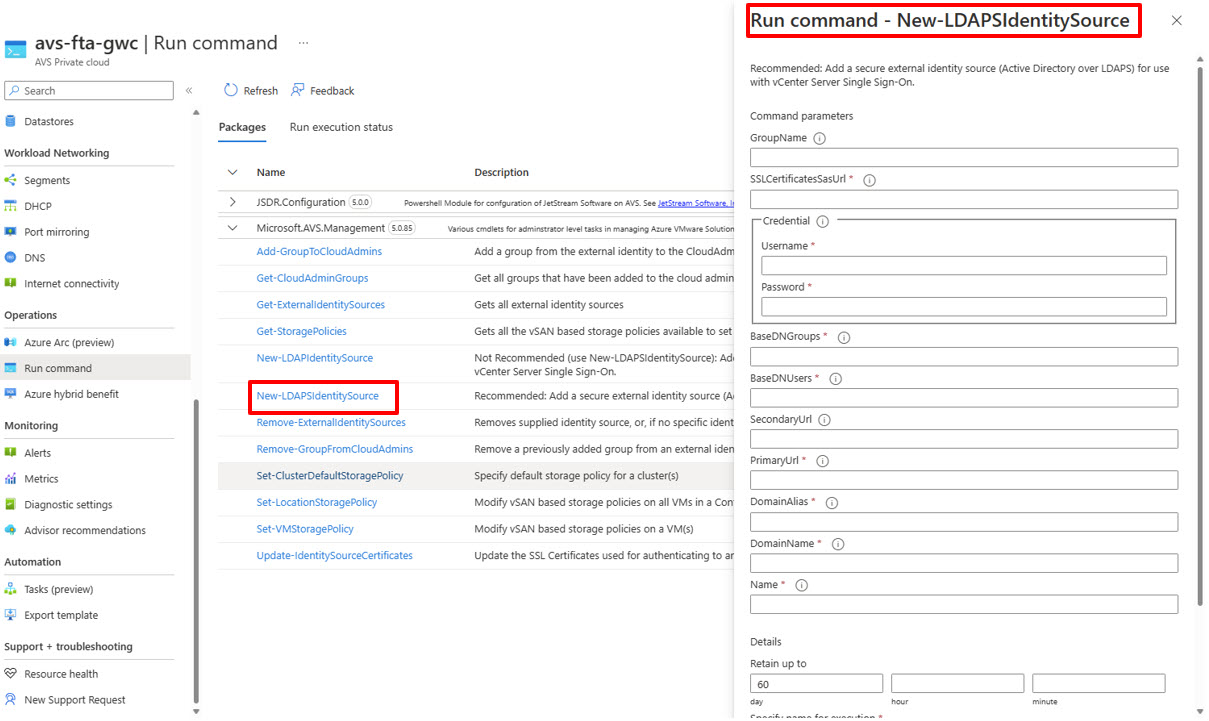
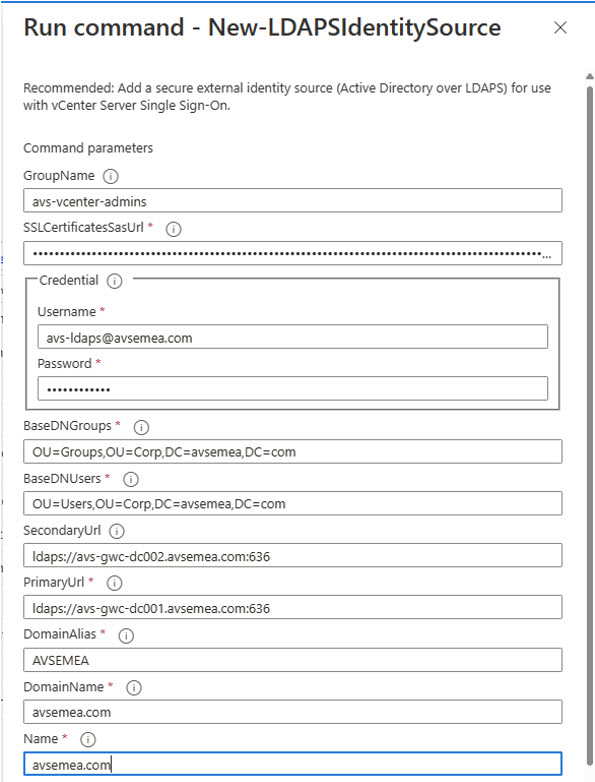
Populate the information as needed.
Note: the SSLCertificateSasUrl is a single string consisting of the SASTokens separated with a “,”. For example, https://avsgwcsa14a2c2da.blob.core.windows.net/ldaps-blog-post/avs-gwc-dc001.cer?sv=2021-10-04&st=2023-01-12T13%3A46%3A45Z&se=2023-01-13T13%3A46%3A45Z&sr=b&sp=rwd&[Removed], https://avsgwcsa14a2c2da.blob.core.windows.net/ldaps-blog-post/avs-gwc-dc002.cer?sv=2021-10-04&st=2023-01-12T13%3A46%3A45Z&se=2023-01-13T13%3A46%3A45Z&sr=b&sp=rwd&[Removed] and pasted as a single long string.
The other values would need to be updated as per your environment.
Note: With the BaseDNGroups and BaseDNUsers, watch the values used as these should be under the same tree, in this example, “OU=Corp,DC=avsemea,DC=com”
Once all information is entered, Run the command.
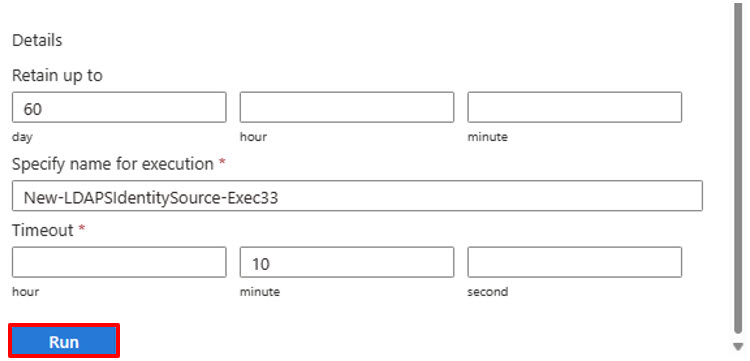
You can check the status of the Run command within the portal, under Operations, Run command, then select Run execution status and then select the correct job.
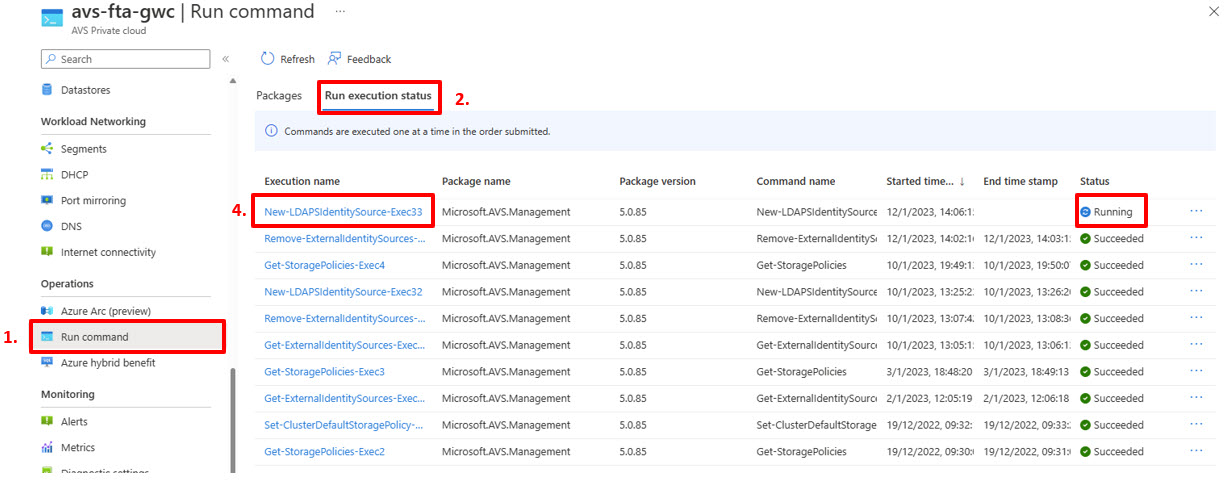
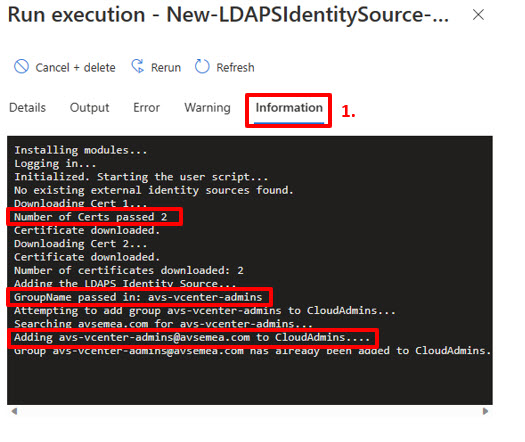
You can check the status of the job now and you are waiting for all the tasks to be completed and show that your selected group was added to CloudAdmins
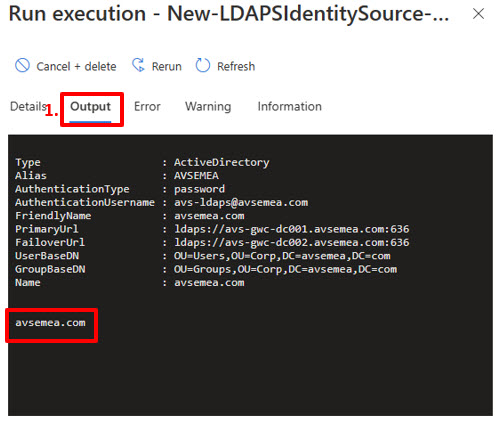
You can also check the output and ensure that the correct name was added.
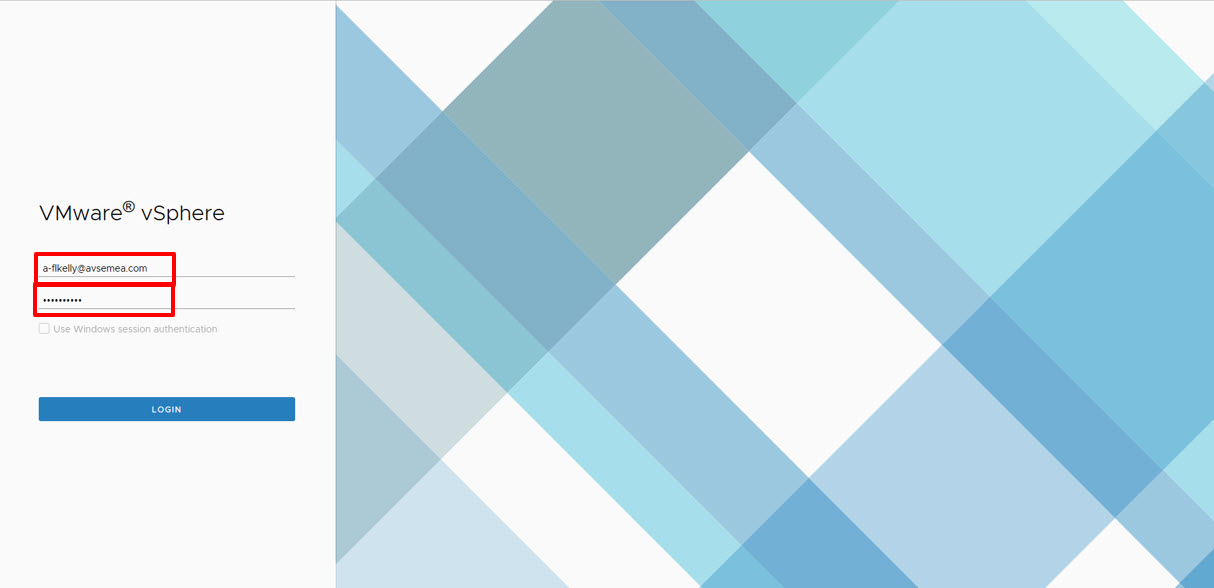
You can logon with LDAP based credentials.